

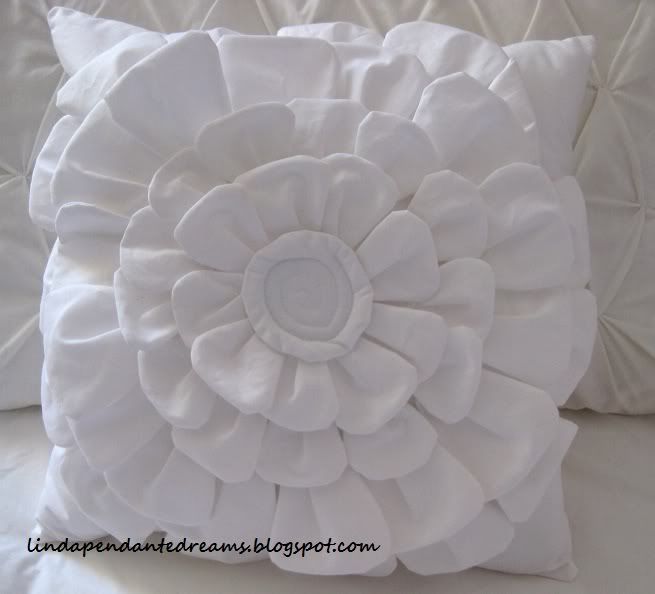
I'll be sewing its mate and doing some serious thinking about whether I want to tackle the matching duvet cover, which would be a huge but entirely doable undertaking.

I'm placing a tutorial for this pillow under the cut.
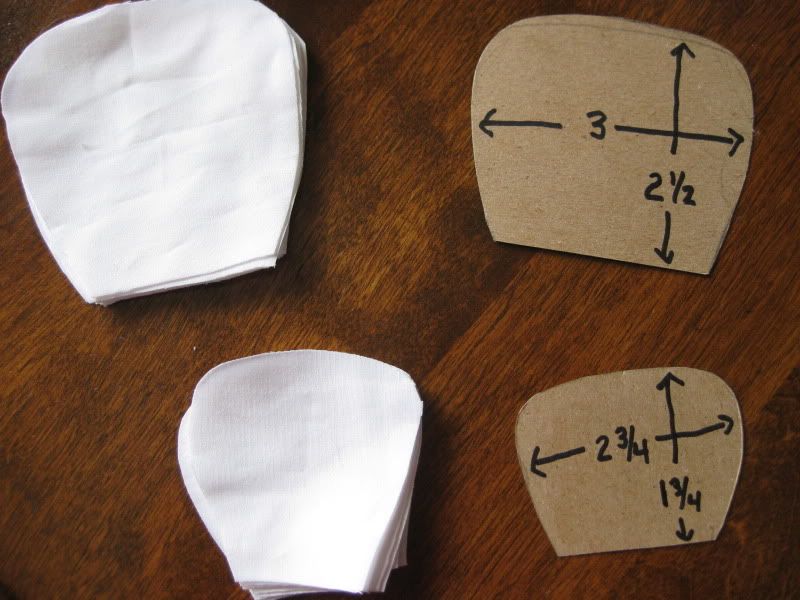
Draw out two petal shapes on cardboard, one larger than the other. Mine were the dimensions shown on the pattern in this photo. Trace the pattern onto your fabric and cut out. I cut out eight layers at a time. For the pillow shown, I needed 30 large petals, and 22 small ones - cut out two pieces for each petal.

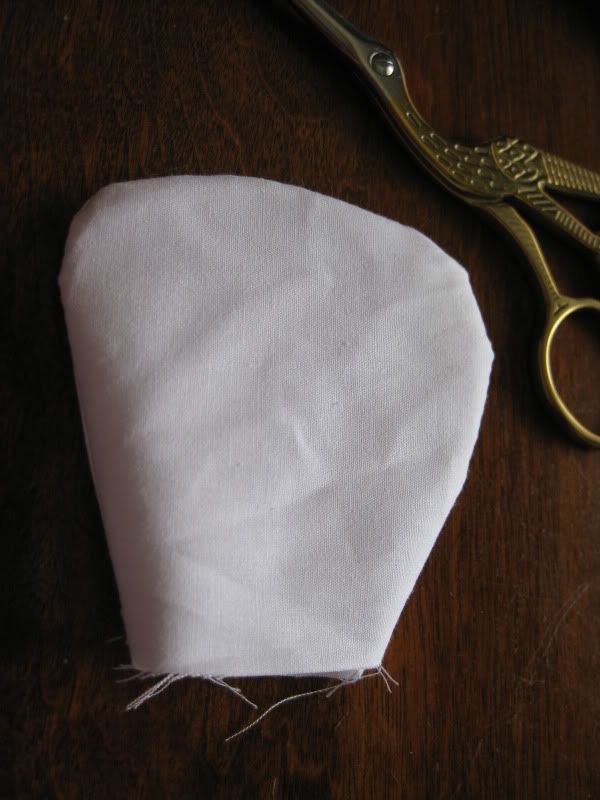
Sew two petals together, leaving the bottom edge open. Turn right side out.
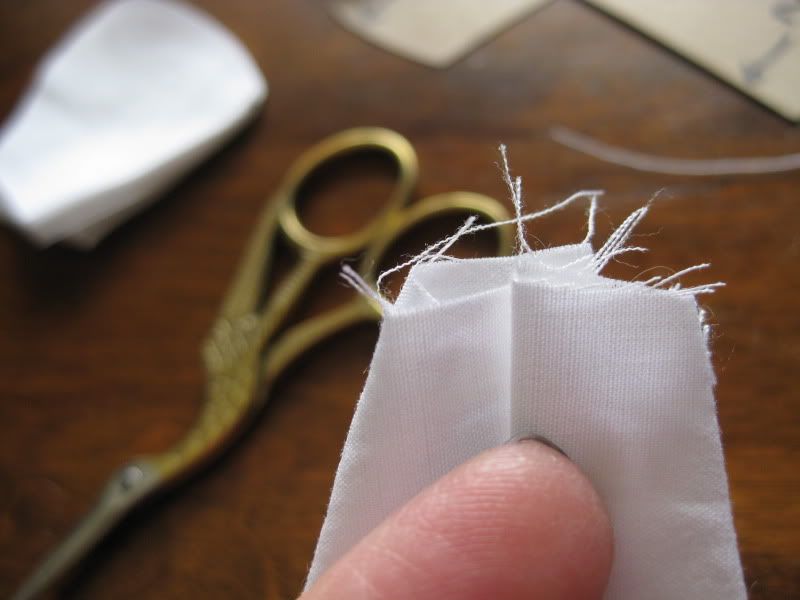
 Make a pleat along the unsewn edge of the petal.


 Do this fifty one more times. Try to think about how worth it this is going to be in the end.
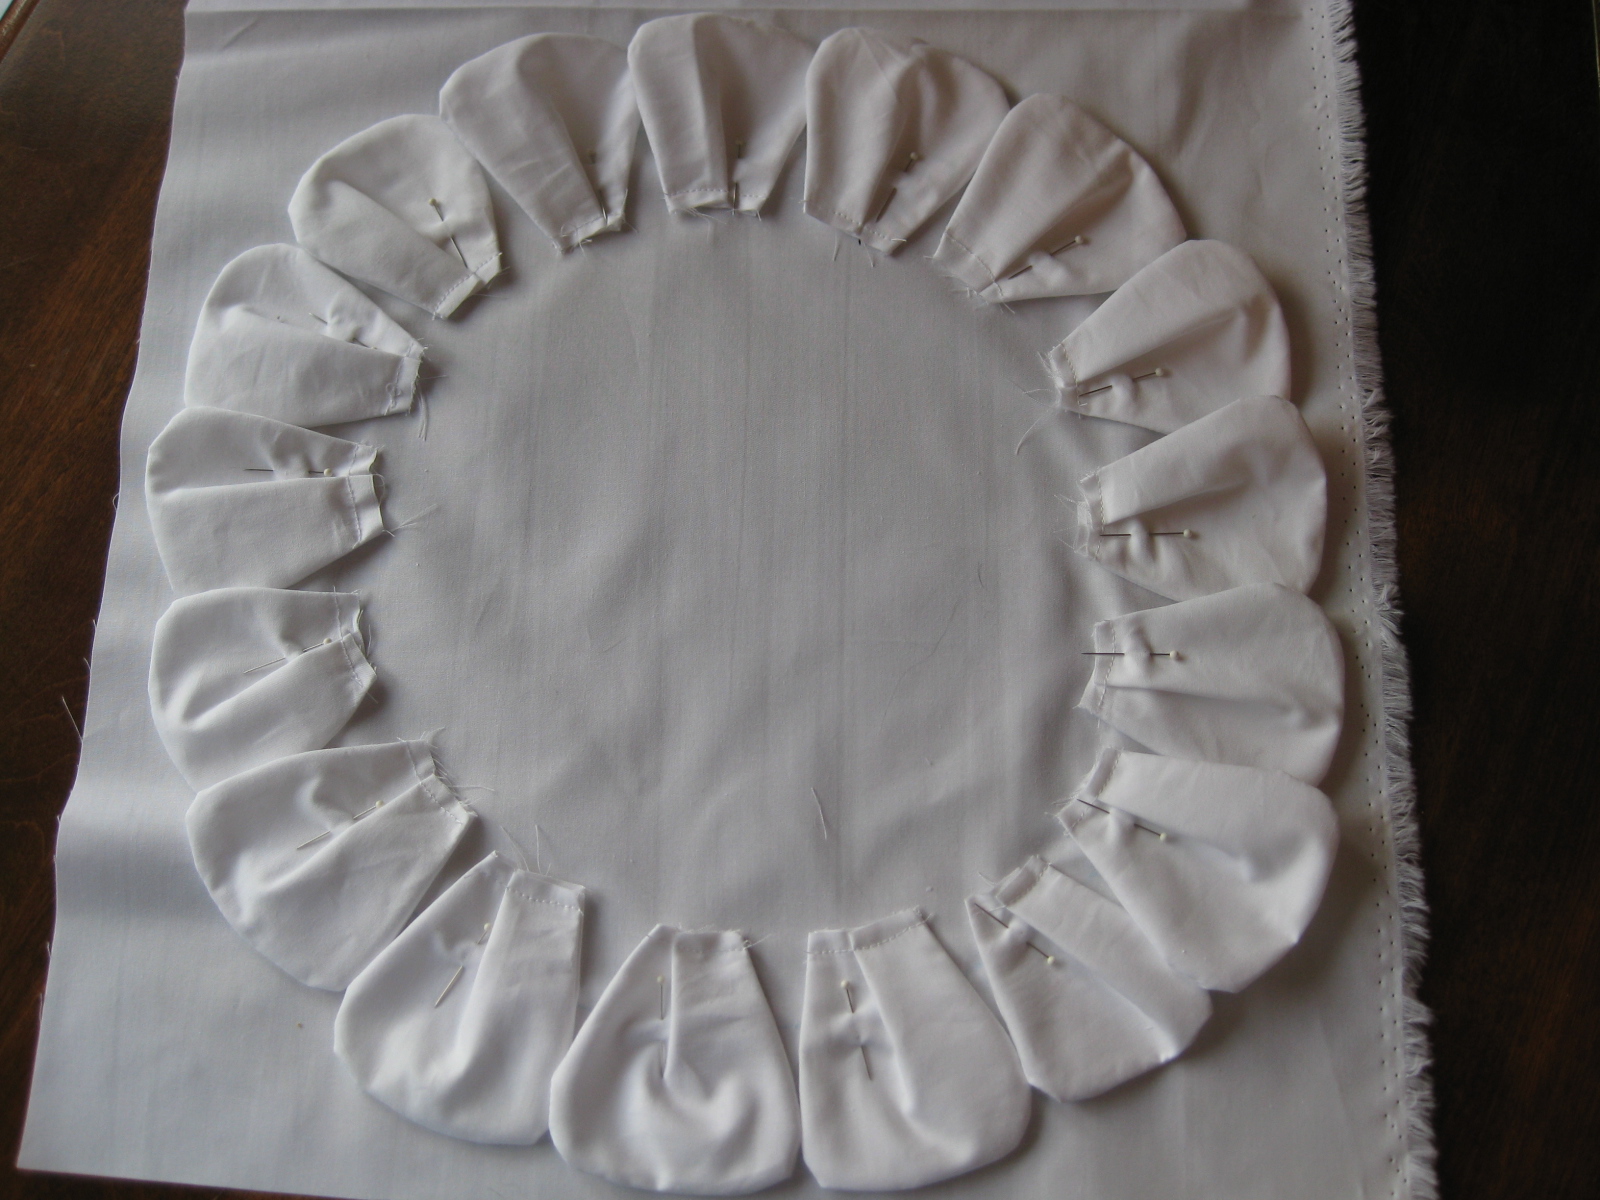
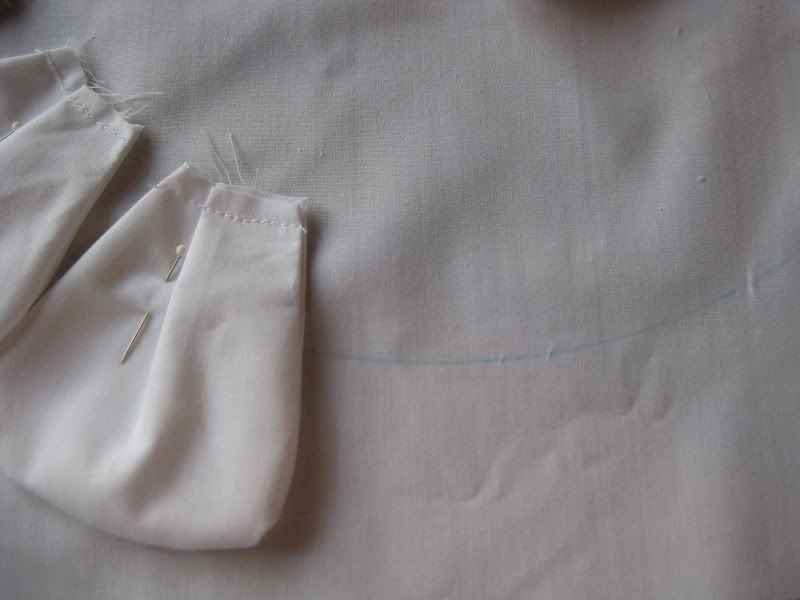
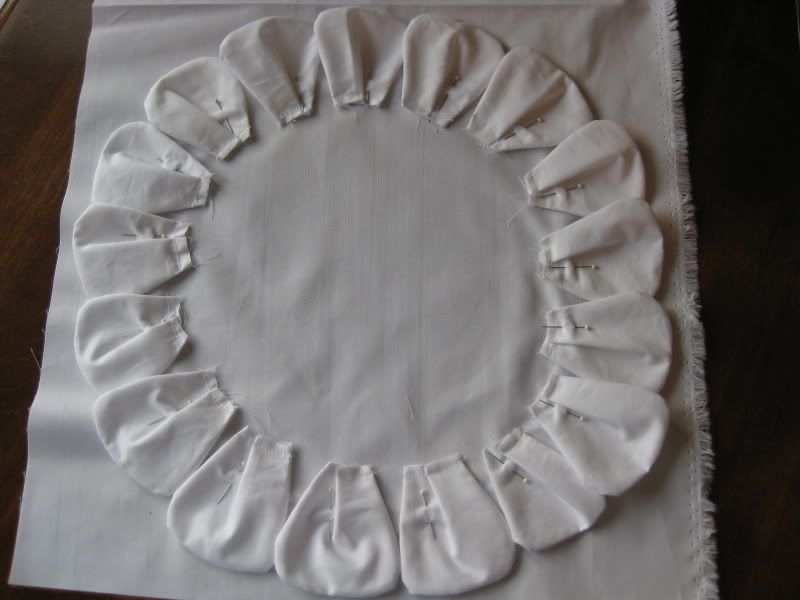
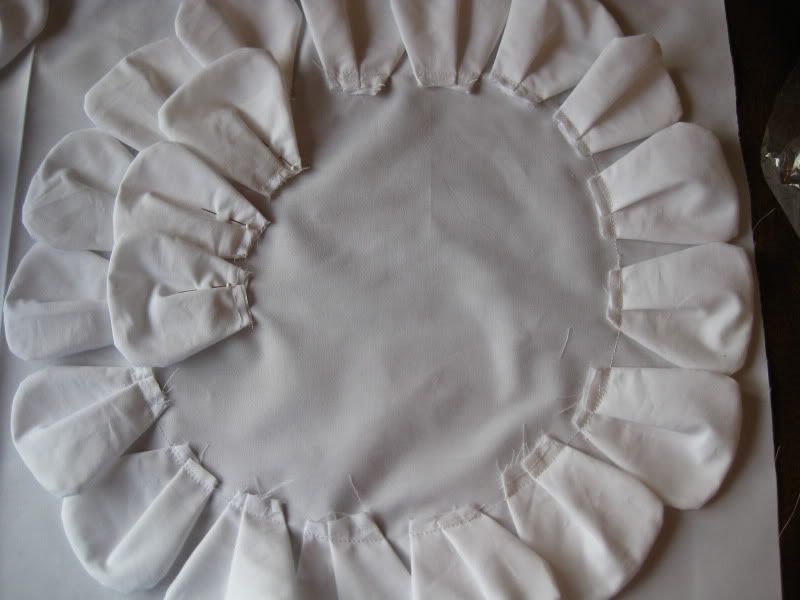
 Start pinning down your first round of large petals around the circle you have drawn. I don't know if you can see this well, but the petals are placed just about in the middle of this line.
 Once all the petals have been pinned down, sew them in place. You don't need to have these absolutely perfectly placed within a millimeter of their lives, imperfection makes them one of a kind.
 Pin down your second round of large petals, and sew them in place.
 Now pin your first round of small petals and sew them down.
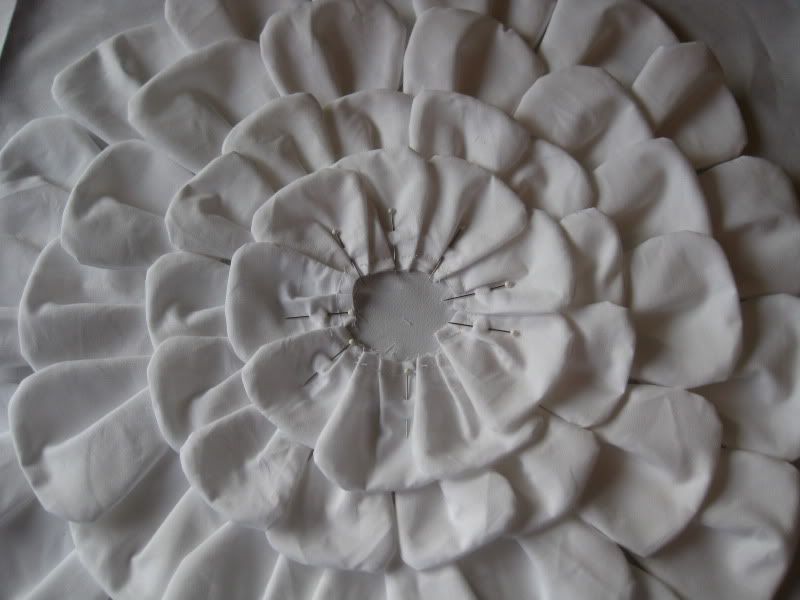
 Now pin and sew down your final round of small petals.
 For the center of the flower, measure the opening left that is not covered in petals, and then cut out two circles that size, plus a half of an inch in diameter.
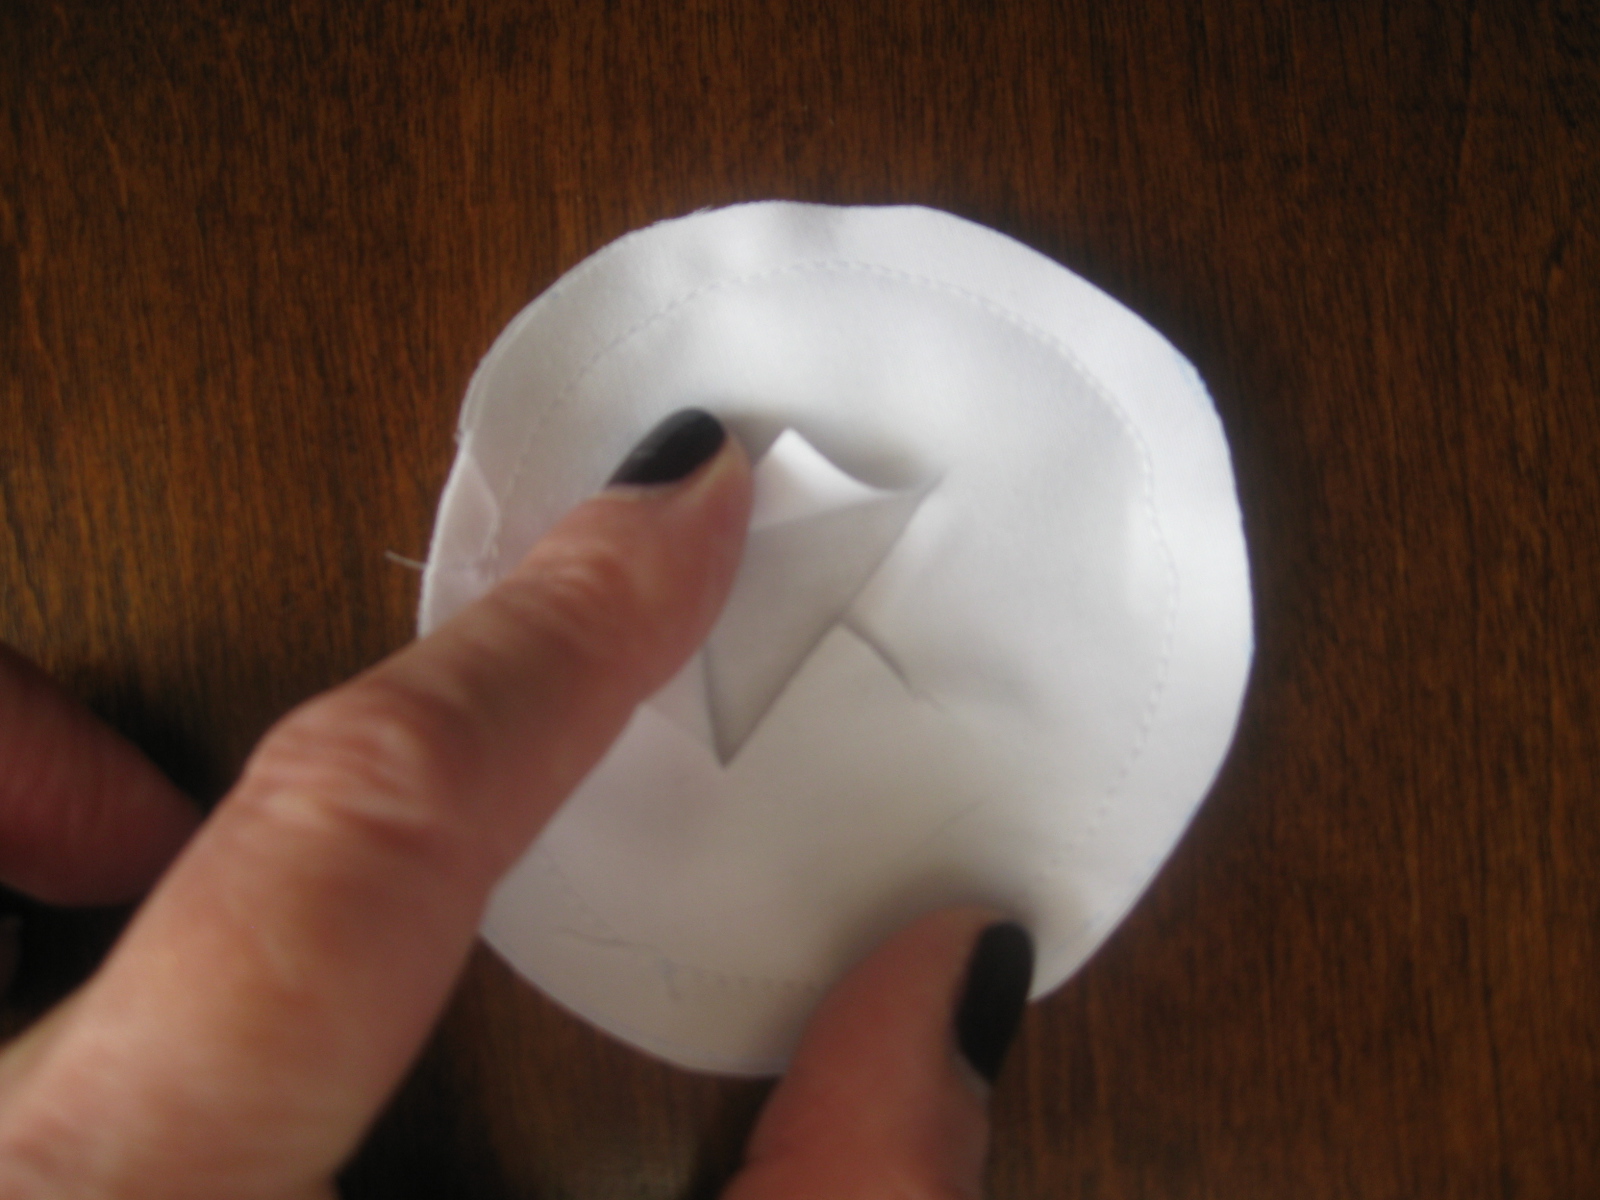
 Sew the two circles together using a 1/4 inch seam allowance and then cut an X shape about an inch long in the center of one of the sides.
 Turn right side out, then insert a bit of quilt batting into the circle.

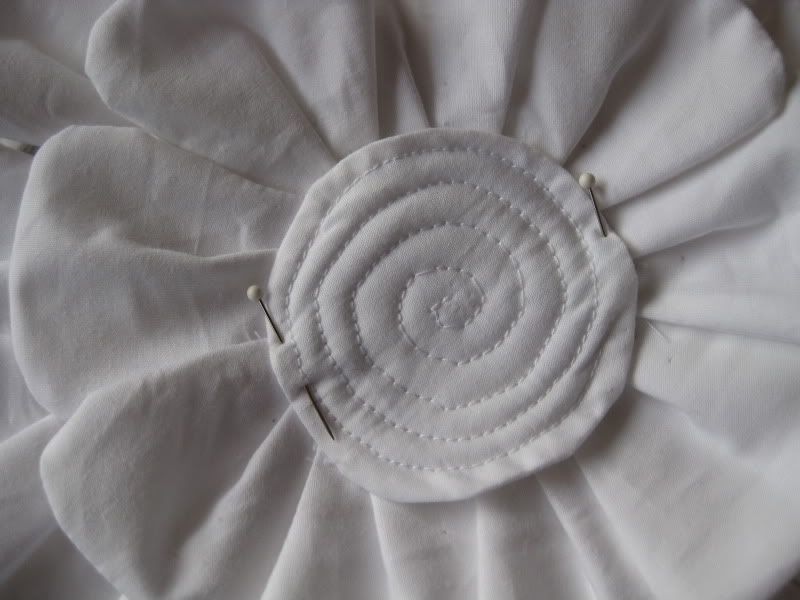
 Now pin down and stitch the circle into the center of your flower.


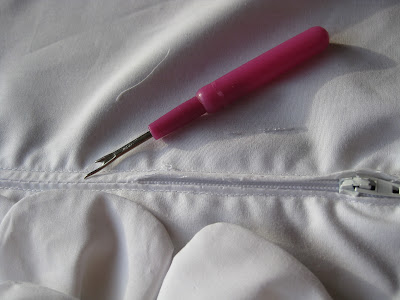
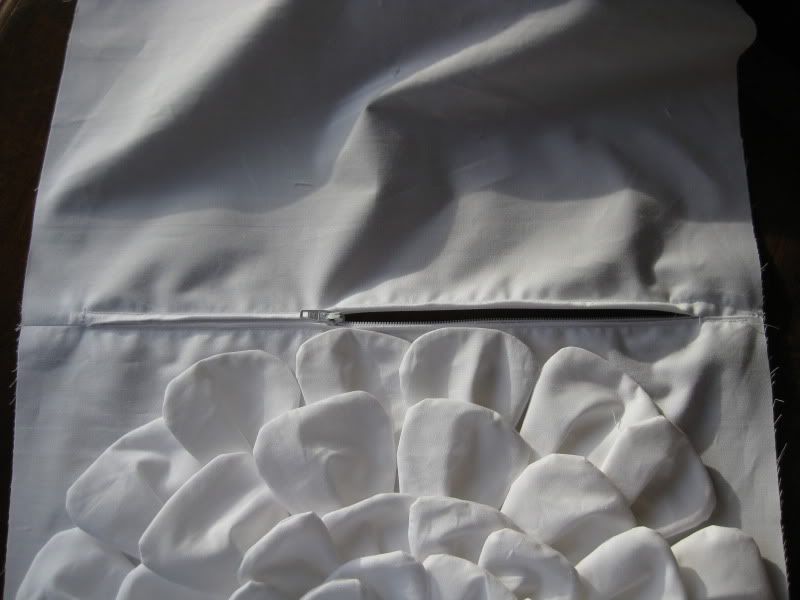
 Now remove the basting stitch along the seam where the zipper is located.
 With right sides together, pin and sew along the remaining three edges of your pillow cover, being careful not to catch any of your petals in the seam as you go.

So you have just done made you a layered petal pillow, go pat yourself on the back and admire your work!


Sew two petals together, leaving the bottom edge open. Turn right side out.


My pillow was cut 14 inches square, if you like this size, cut out two pieces of fabric 14 inches square! Or do whatever size you like, I'm not going to judge!
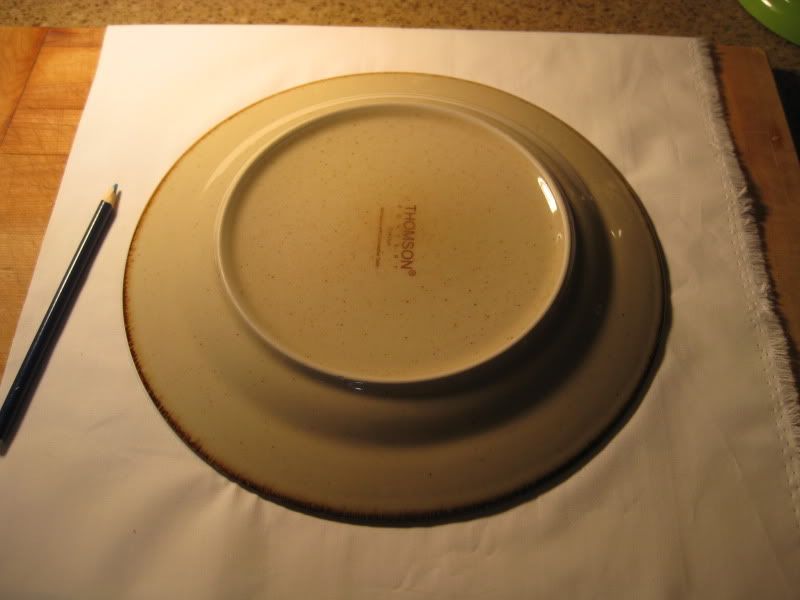
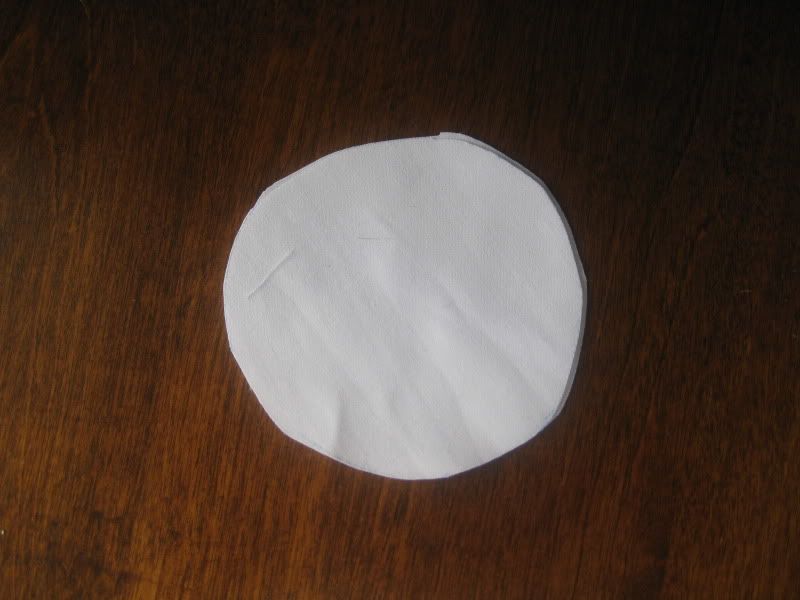
Draw a circle centered on one of your squares. I used a very high tech circle making implement otherwise known as a dinner plate. I used a washable pencil type of deal, only because I have one. I have been known to use a regular lead pencil if I'm in a hurry. Nobody gets hurt.


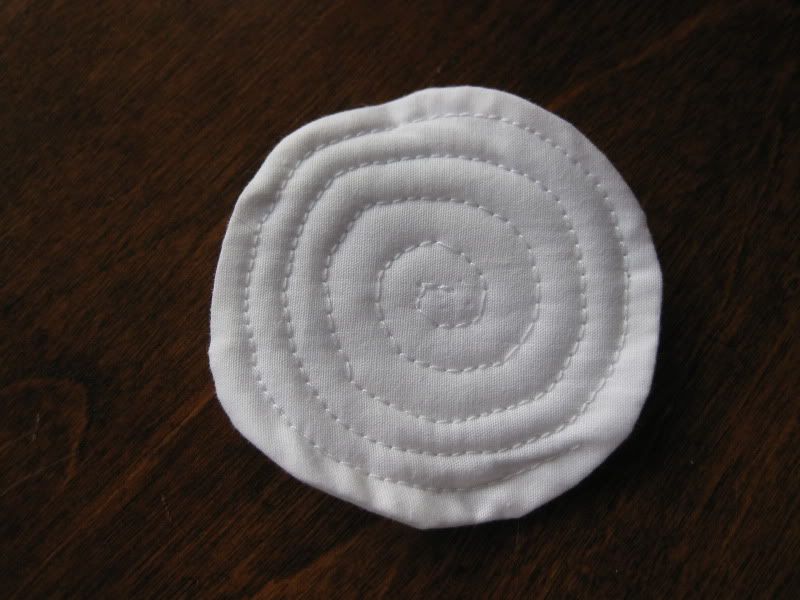
Stitch this circle piece in a spiral starting at the outer edge and working into the center, like so:


There are many ways to finish off the pillow at this point. If you like to live dangerously, just sew your other square piece together with the petal piece and stuff it and hope it never gets dirty, or that if you wash it - the stuffing drys well. You can do an envelope closure or several different closure methods, do whatever works for you, I won't disagree with your choice.
At this point, I'd like to offer up this advice on stuffing: It's expensive. Pillow forms are even more so. Here's what I do. I find out that someone is having a really good sale on bed pillows. I buy them dirt cheap. I cut them up into whatever size I need and sew up the seam. Done. Cheap. Anyway!
I chose to install a zipper on my pillow cover. I like the tight fit you get with them, and I want to be able to remove and wash this cover with little to no difficulty since it's white and I run a cat army around here.
I will quickly and hopefully without too much pain, show you one easy way to install a zipper.
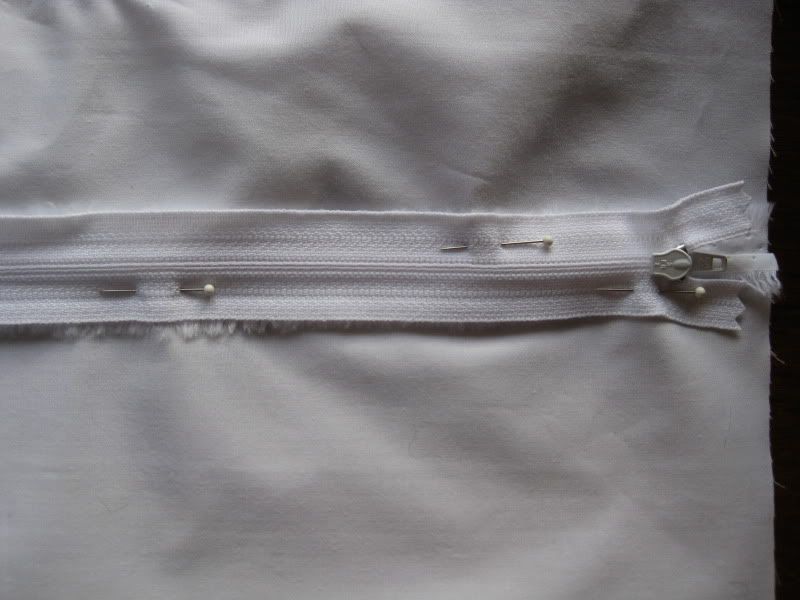
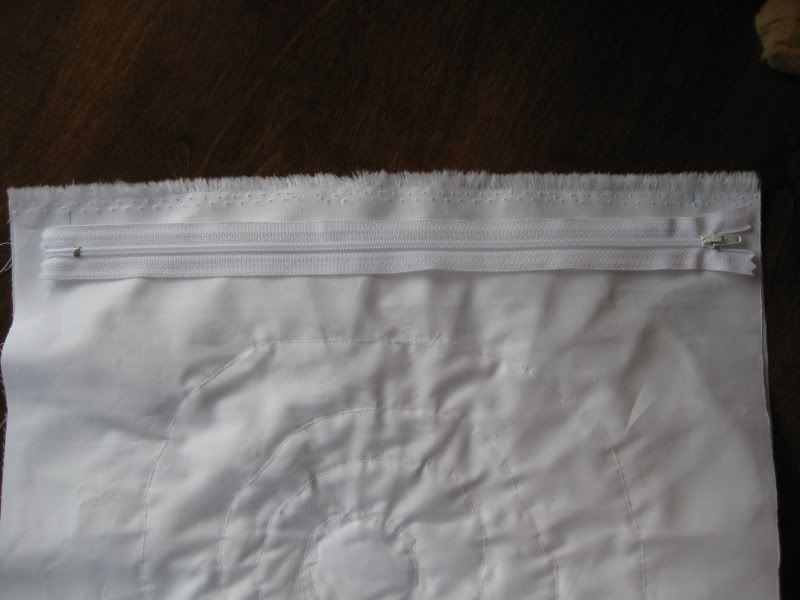
I used a 12 inch zipper for this cover. Lay your zipper down on one side of your fabric, and make a marking at the top and bottom, indicating where the zipper starts and ends. I don't know if you can see this very well, but I have made a mark with blue where the zipper pull starts, and where the metal bar ends.

You're going to sew this seam now as follows: Using normal stitch length, sew your front and back pieces with right sides together from one edge to the blue mark. Now set your stitch to the longest length (basting stitch) and sew along where your zipper will go until the second blue mark. Now set your stitch back to normal stitch length and finish off the seam.
Press this seam open and lay your zipper so that the pull tab is face down on your seam. Pin the zipper to the seam edges.

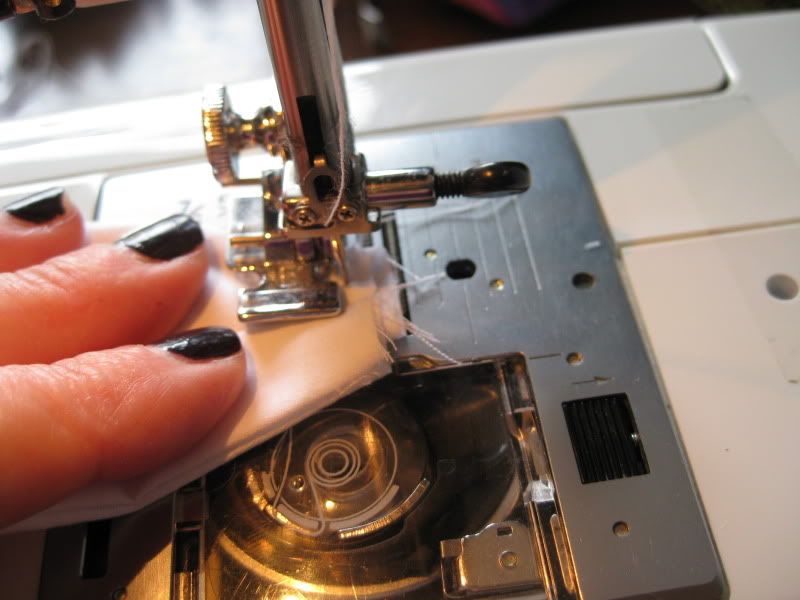
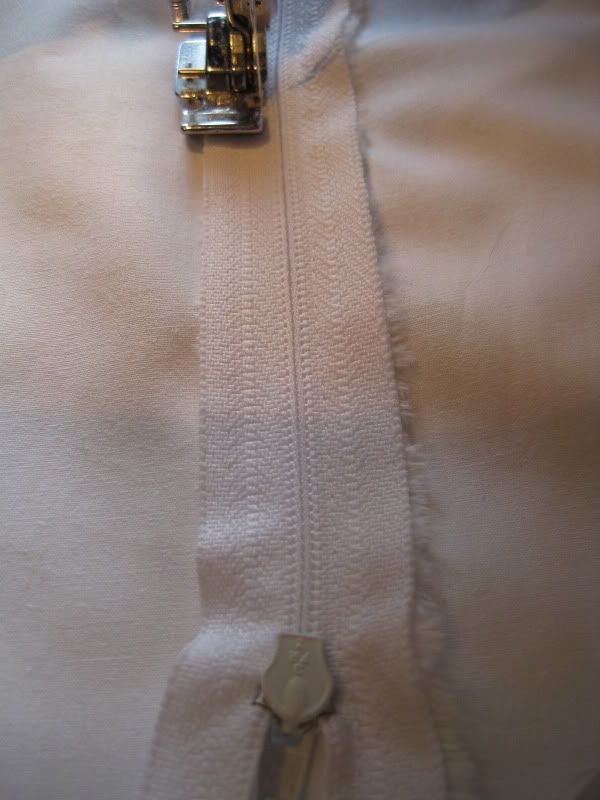
Using your zipper foot, stitch down both the sides of the zipper, very close to the center where the teeth are located.


Ta dah! You just installed a zipper with no tears. Hopefully.
Now this is important - open your zipper at least half way or you will curse later.

And now turn right side out, because you totally opened up your zipper half way, am I right?

So you have just done made you a layered petal pillow, go pat yourself on the back and admire your work!

Fabulous!! Thank you!!
ReplyDeleteoh that's gorgeous! thanks for sharing!
ReplyDeleteThanks, and you're welcome!
DeleteThanks for posting this!
ReplyDeleteI'm going to bookmark this because not only is it super cool, but that is the best way of putting in a zipper I've ever seen.
ReplyDeleteHa! Thanks! I think I leaned installing a zipper this way by watching my mother sew when I was little.
DeleteThis is gorgeous!!! Thanks so much for the tutorial. I'd love for you to share this at my link party - it runs Tues-Sat. http://adventuresofadiymom.blogspot.com/2012/02/terrific-tuesdays-4.html
ReplyDeleteRachel
WoW!!!! THis is SO aamzing! I am featuring it today at somedaycrafts.blogspot.com. I LOVE it!!!! Grab my "featured" button.
ReplyDeleteWow! I love ur pillow! it s so beautiful. Thanks for sharing..
ReplyDeleteHi Linda! Your pillow is so beautiful!
ReplyDeleteMe ha gustado muchísimo. Gracias, gracias y gracias.
ReplyDeleteCharo
www.cosiendoyaprendiendo.blogspot.com
I really liked. Thanks, thanks and thanks.
This is amazing!!!!!
ReplyDeleteMarvelous! And doable.
ReplyDeleteThank you!
Kathy
This is beautiful! Thanks for posting the tutorial.
ReplyDeletebeautiful pillow! i love that it is white.
ReplyDeletei would love for you to add this to my new link party... spreading the love. please go check it out if you are interested!
http://lovenotesbylauryn.blogspot.com/search/label/spread%20the%20love%20link%20party
{love} lauryn @ love notes by lauryn
Hi!This tutorial is great!!And exactly what i was looking for!! Thank You!!
ReplyDeleteoh I love that, I can see doing it in all sorts of colours, bright for a little girl, muted for a more mature person!
ReplyDeleteOK, it's official, I think I am going to be in love with your blog. This is amazing!
ReplyDeleteAdrianne
www.happyhourprojects.com
I think this is one of my favorite designs of this kind of pillow I've seen. AND, I'm also saving the zipper instructions! I have been holding off finishing a new cover I made for a cushion for my rocker because of the zipper part. LOL! Thank you so much!
ReplyDeleteFantastic; deceptively simple too!
ReplyDeleteThanks for the link from LJ. Gonna give one of these ago this weekend.
I love this pillow. It's so pretty! I'm going to try to make a couple just like it. I will probably make them in red. I'm now following from Inspiration Friday.
ReplyDeleteThat's adorable! I just became a follower and want to invite you to stop by my brand new blog and follow me, too:) Thanks!
ReplyDeletewww.gratefulbelly.com
Great tutorial and wow, what a dreamy pillow :) thanks for sharing. I'm a new follower, I invite you to follow me back
ReplyDeleteJoAnn
sweetpepperrose.blogspot.com
Such a comprehensive tutorial and so easy to follow!!! Your pillow is awesome!!! Thanks so much for sharing...
ReplyDeleteBeeeuuutiful. And your way of writing a tutorial is to be admired. I need spring and wonder what it would look like in pretty colors......
ReplyDeleteFicou muito mais muito linda parabens e obrigada por dividir com a gente o tutorial!
ReplyDeleteVc poderia me passar o tamanho e a largura em centimetros dos moldes das petalas por favor! De ja muito obrigada! http://criacoesdamarcia.blogspot.com/
ReplyDeleteWhat a beautiful pillow, thanks for the detailed tutorial! You did a great job and this looks lovely!
ReplyDeleteowowowowowo - wonderfull. aristocratic.
ReplyDeletethank u for sharing. thank u for tutorial.
all the best, ruth from Israel
I love this pillow. I love it so much I shared it on my blog (with a link to yours) AND I made one over the weekend! Thanks so much for sharing this with us! This is awesome! :D Chris
ReplyDeleteA fabulous pillow along with a detailed tutorial is so special! Thank you for sharing at Potpourri Friday! I appreciate your participation! I hope you will make this a weekly party stop!
ReplyDeleteI am following via GFC and hope you will too!
ReplyDeletesuch a gorgeous pillow!Two thumbs up! i made mine when I saw yours. Do visit my blog to see my version,ya! http://www.blackbookofsewing.blogspot.com/2012/03/flower-petal-pillow.html
ReplyDeleteHi - I love your pillow :)
ReplyDeleteI'm a beginner sewer - can you tell me what type of material you used or would be best for this pillow?
Thanks for sharing your tutorial!
Very very pretty. Definitely worth the effort.
ReplyDeleteThis will be my next sewing project. Thanks for the tutorial, the pillow is beautiful.
ReplyDeleteSusanB
Since your photos are down, can you comment as to the dimensions of the 2 sides of petals so I can create my own template? I was hoping to make this tonight as a gift! I will be sure to share pictures once complete!
ReplyDeleteThank you
Sizes***
Deletethis is adorable.I want to make it right now.Thanks!!
ReplyDeleteHi Linda,
ReplyDeleteI was looking for a tutorial to make a pillow just like this one, and you have a wonderful tutorial, I'm your follower now,
have a nice day
Laura
Hi Linda, I've featured your Petal Pillow today...
ReplyDeletehttp://threadingmyway.blogspot.com/2012/06/ten-pillow-and-cushion-tutorials.html
Feel free to grab a featured button.
This pillow is adorable, I love it! Thanks for sharing!
ReplyDeleteCARELI
Hi Linda
ReplyDeleteI only just found your blog, but am VERY impressed with this tutorial! You have made what looks like a very elaborate and beautiful project, look simple. Thank you SO much. I'm off to become a 'follower'.
Judi
Gracias por el tutorial,estoy ansiosa por realizar la obra.
ReplyDeleteYou made the tutorial easy to follow, Im going to make this.
ReplyDeleteGreat tutorial. Loved this idea. I am obsessed with pillows right now. I would like to know how to post my ideas for free on the web if anyone has any ideas how to do that.
ReplyDeleteGreat tutorial. Loved this idea. I am obsessed with pillows right now. I need to post some of the things I have made,but I am not sure what the easiest way would be. Thanks.
ReplyDeleteMerci pour le partage. Que les canadiennes sont sympas
ReplyDeleteBonne fin de journée
Nice articles and your information valuable and good articles thanks for the sharing information Square Memory Foam Cushion
ReplyDeleteNice articles and your information valuable and good articles thank for the sharing information memory foam pillow
ReplyDeleteNice articles and your information valuable and good articles thanks for the sharing information orthopedic pillow for neck and spine support
ReplyDeleteNice articles and your information valuable and good articles thanks for the sharing information pressure relief seat cushion
ReplyDeleteNice articles and your information valuable and good articles thanks for the sharing information memory foam leg support pillow
ReplyDelete