
Sunday, 11 November 2012
Taupe Floral Pillow


Hanging Stars
I made this strand of hanging stars for Christmas to the delight and gratitude of my cats who will no doubt shred them the second I turn my back, even though I made them their very own catnip filled stars which they promptly ignored.

This is a very quick and very easy project, and I'm placing a tutorial under the cut.

This is a very quick and very easy project, and I'm placing a tutorial under the cut.
Sunday, 4 November 2012
Mismatched Mishmash Fingerless Gloves

I knit these as a little extra Christmas gift for Erica, who likes
oddball weirdness. This girl will lose one or both within 92 hours of
receiving them but they were a great way to use up the tiny bits of leftover yarn I
am never able to bring myself to throw away.
Darning in the massive amount of ends from all the colour changing took almost as long as knitting these things, but I’ve never knit stripes before and I have been wanting to.
Darning in the massive amount of ends from all the colour changing took almost as long as knitting these things, but I’ve never knit stripes before and I have been wanting to.
Tuesday, 30 October 2012
Lace Market Bag

I'm thinking of dying it or staining it with tea since white isn't practical for foodstuffs.
Pattern information is here: Ravelry page link.
Wednesday, 10 October 2012
Christmas Gift Knitting
Cooler weather has prompted me to get ahead of myself on Christmas knitting. I made this set for my young niece:

I just love this hat to death!

Details and free pattern information can be found on my Ravelry Page.

I just love this hat to death!

Details and free pattern information can be found on my Ravelry Page.
Saturday, 8 September 2012
Knit Mouse In The Hood

Details about the patterns and yarns can be found on my Ravelry page.
Wednesday, 8 August 2012
Vivian Cosmetic Bag
I sewed this little purse sized cosmetic bag today to give as a little gift for my son's good friend Vivian, who's been helping him tremendously to settle in Taipei, where he's living for a year.

I had iron-on labels printed cheaply, here's a tip: They were advertised as the kind of labels you have your kid's name printed on for summer camp clothing. I had them printed with a variation of the name of my blog instead. Every other kind of custom labels I looked at were crazy expensive.
I added 'Chaos' instead of 'Dreams' to my labels because my house looks like chaos when I'm doing any sort of crafting, and I guess my method of crafting is pretty chaotic too.


I found the fabrics at Walmart, pre-cut into 21 X 42 inch squares for $2.47 each.
The tutorial for this bag can be found here.

I had iron-on labels printed cheaply, here's a tip: They were advertised as the kind of labels you have your kid's name printed on for summer camp clothing. I had them printed with a variation of the name of my blog instead. Every other kind of custom labels I looked at were crazy expensive.
I added 'Chaos' instead of 'Dreams' to my labels because my house looks like chaos when I'm doing any sort of crafting, and I guess my method of crafting is pretty chaotic too.


I found the fabrics at Walmart, pre-cut into 21 X 42 inch squares for $2.47 each.
The tutorial for this bag can be found here.
Saturday, 23 June 2012
Vintage Flour Sack

I'm a little obsessed with how my pantry looks (it's a sickness), so for some time, I have been wanting to do something about how flour, sugar, and rice is stored. I decided to use old fashioned cotton sacks, so I made this one today.
I will be making a tutorial for this very easy beginners project when I make the other sacks. For those who don't need a tutorial, basically, I measured the sack, cut out front and back, sewed it up and formed boxed corners on the bottom edge. I hemmed the top edge and then sewed in a strip of velcro. To keep the sack from sagging as the flour is used up, you can stuff it with grocery store bags if you are as fussy as I am.
The image is transferred after construction so that it can be properly centered.
I found the image in a google photo search, cleaned it up in Photoshop and used the transfer technique that is explained here.
Thursday, 21 June 2012
Bottled Photo

I have been wanting to display this photograph of my parents on their wedding day, so I decided to stuff them over rocks in a bottle with a cork stopper. I started thinking about how old this jar is, but if I told you how long I've had the set, I would be giving away how very, very old I am.
I gathered up some very old silver which is tarnished beyond belief, and which I love that way. My mother left the tray here and it's been sitting forgotten under my kitchen sink, and to think how close I came to throwing it away!
I think the heart shaped trinket box is just so perfect with a photo of the day you promised to love and cherish your sweetheart forever! The box is another item I almost got rid of too, so it really does pay to be a hoarder, no matter what anyone tells you to the contrary. It's as though something was telling me to save all of these things, that they were meant to be grouped together someday.
My parents are going to love what I've done with their photo!
Tuesday, 19 June 2012
Felt Needle Holder Books
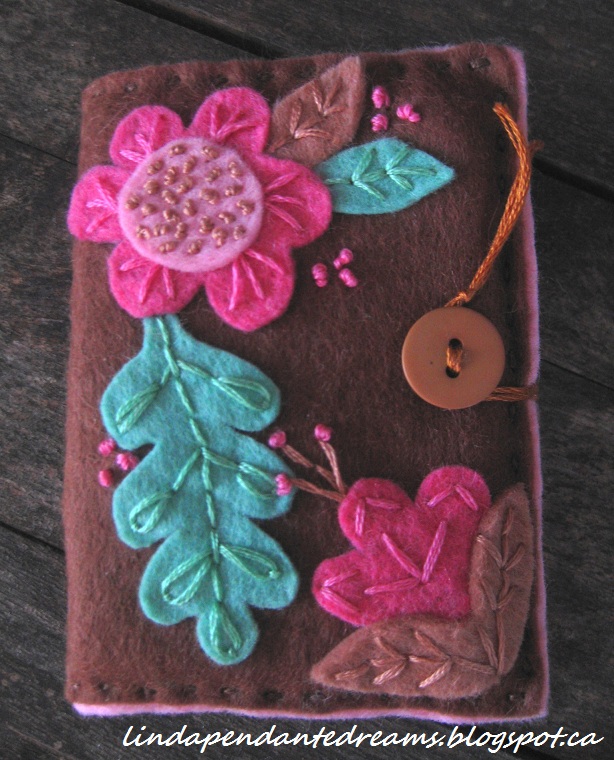


I saw these on Pinterest and decided to make one for myself and one for my mother. They were made with scraps of felt I had in my stash.
I would have liked to have had a better choice of colours, but the dang fabric store near me closed, and now it's a huge deal to get to one. Also, when I decide to do something, I need to do it *now*, and that means using what's around the house.
Friday, 15 June 2012
Refinished Chair With Seat Cushion Tutorial

I finally refinished the last of this set of four chairs and thought I'd make a tutorial on how to make custom seat cushions. Photos and instructions are after the break.
Wednesday, 13 June 2012
Sheet Music Vase

I had seen an arrangement like this on a DIY blog and have wanted to make one for a while.
I stained some cardstock with tea, found a musical score I liked the look of, and printed it in landscape orientation. I wrapped it around a tall glass jar (you can use a tin can), and glued it down.
Tuesday, 12 June 2012
Wreath Topiary

I put this together yesterday using a coat hanger for the base of the
wreath, a glue gun, and a mixed bag of greenery from my favourite place -
the dollar store. I used a clay pot I had on hand, and cut a foam
oasis to fit inside, which anchors the coat hanger. A ribbon scavenged
from a pair of cargo pants was wrapped and tied around the pot to finish
it off.
Wednesday, 30 May 2012
Rust Equals Love
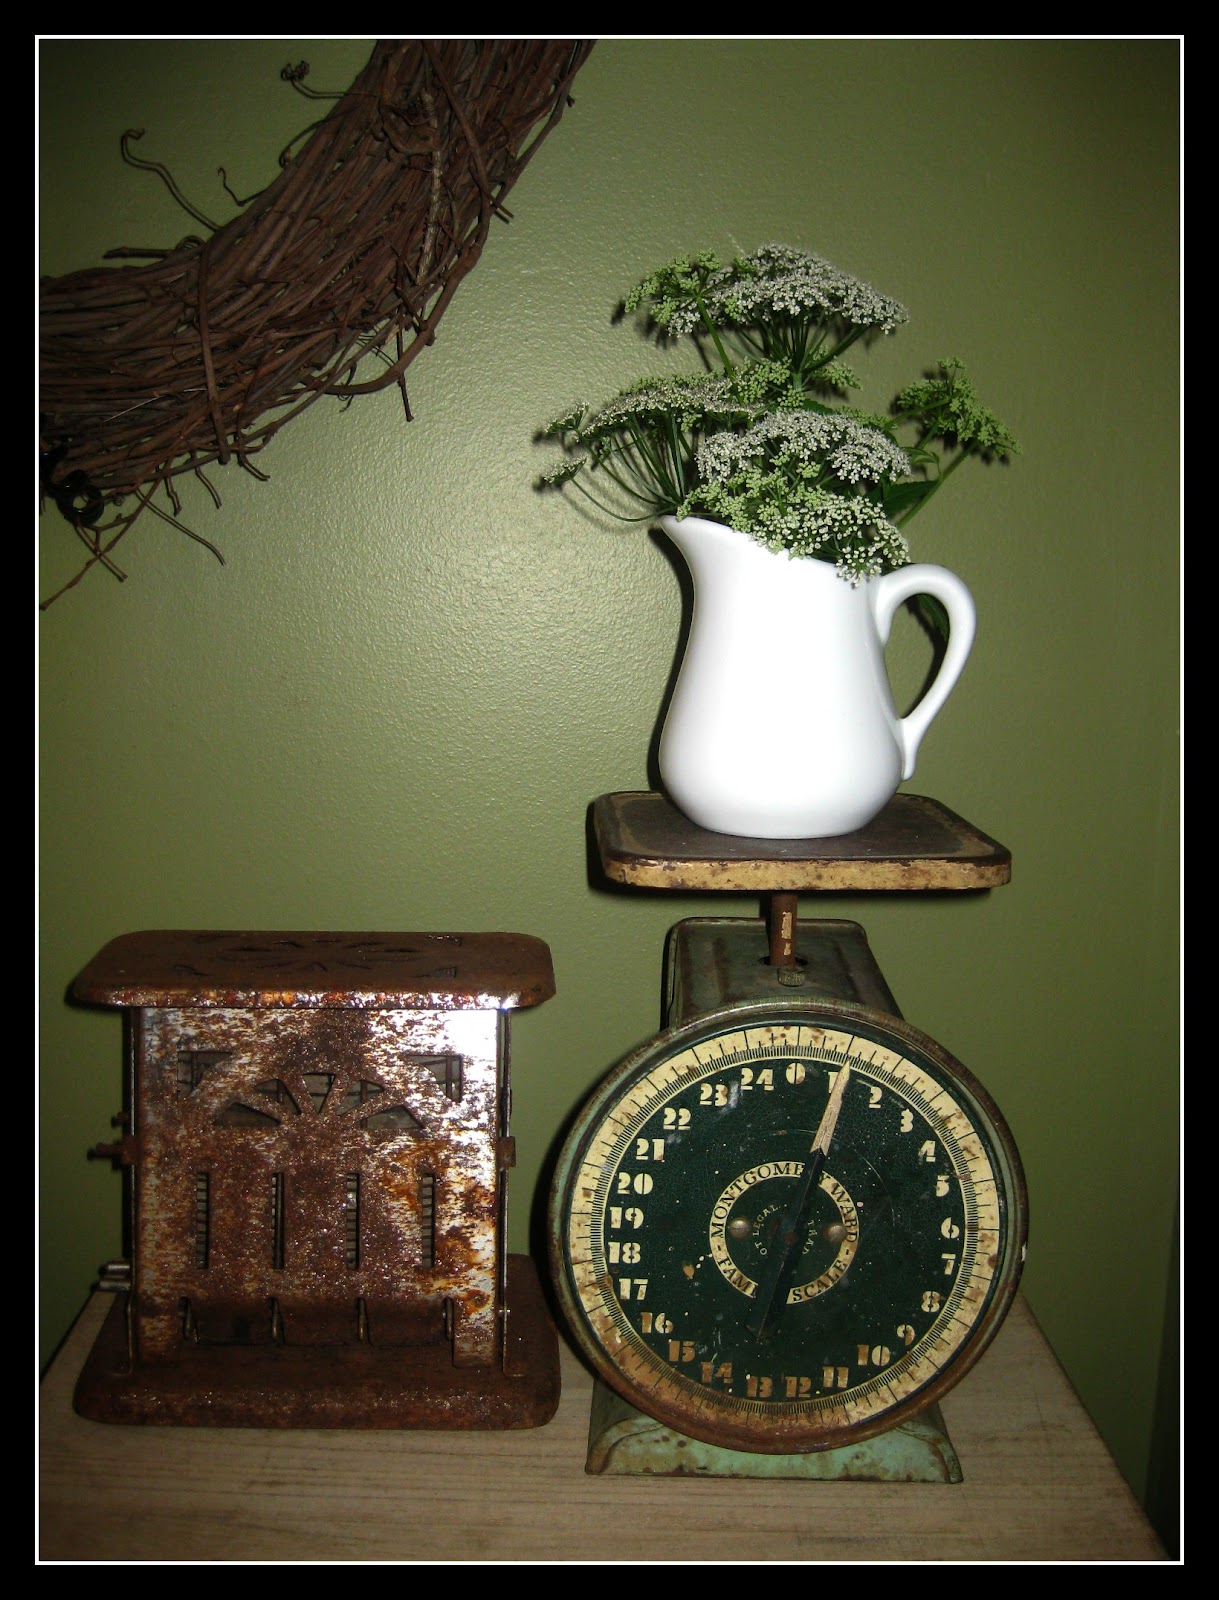
When Robert asked me what I'd like for my birthday, I said, 'things that are rusty'. I found these two treasures on Etsy, sold by two different vendors.
I can't tell you how much rusty, chipped things make me happy, as well as the weeds running rampant in my garden which produce delicate white teeny flowers..
Friday, 18 May 2012

Wednesday, 16 May 2012
Old Cologne Ad Transfer Onto Wood Door

I had a really old cabinet that I turned into a display shelf and I kept the door thinking I would find a use for it later. I transferred this image of an old cologne ad found at The Graphics Fairy onto it and as you can see, it really blurred. I put it aside, thinking I would sand it off and start over but I didn't want to lose the patina. After looking at it awhile, I decided that I like the smudgy rough old look of it and I'm leaving it alone. Perfection is over-rated.

Monday, 14 May 2012
How to make your own (cheap) fabric mats for picture framing.

I framed this print today. I found this image I loved and printed it onto thin cotton fabric using my ink jet printer, and made a mat using fabric and ribbon. My father custom made the frame for me years ago and when I tired of the needle work that was in it, I decided to make up my own mat because they're expensive to have cut to size at the framing shop where I live.
Friday, 11 May 2012
Quick & Easy Mother's Day Gift
I sewed some sachets filled with French lavender and tucked them into a matching gift bag this morning.


I transferred some images onto pure cotton fabric using the CitraSolv method explained here.

I found and downloaded a pretty free font, printed a tag on cardstock, and trimmed it with scissors that cut with a fancy edge.


I transferred some images onto pure cotton fabric using the CitraSolv method explained here.

I found and downloaded a pretty free font, printed a tag on cardstock, and trimmed it with scissors that cut with a fancy edge.
Saturday, 28 April 2012
Strawberry Quick Cardigan


Monday, 2 April 2012
Twig Spring Sign

I found this idea on a blog link party and loved everything about it.
As you can see, I had a bit of a problem keeping the twigs curved for the S, so I ended up enforcing the bottom twig together with curved wire, then wrapping with jute.
To bend your twigs, first choose new green growth, very gently bend them and submerse them, coiled, in the bottom of a glass of water or a jar for about a day. Take them out and then wrap them around a paper towel or toilet paper roll and tape them into place. Let them dry for at least two days.
Assemble the twigs using jute or twine, gluing the loose end with hot glue.
As you can see, I had a bit of a problem keeping the twigs curved for the S, so I ended up enforcing the bottom twig together with curved wire, then wrapping with jute.
To bend your twigs, first choose new green growth, very gently bend them and submerse them, coiled, in the bottom of a glass of water or a jar for about a day. Take them out and then wrap them around a paper towel or toilet paper roll and tape them into place. Let them dry for at least two days.
Assemble the twigs using jute or twine, gluing the loose end with hot glue.
Subscribe to:
Posts (Atom)