

I used a medium weight pure undyed cotton for these. I don't know if you can transfer an image onto fabrics other than pure cotton using this method, you'd have to try to find out.
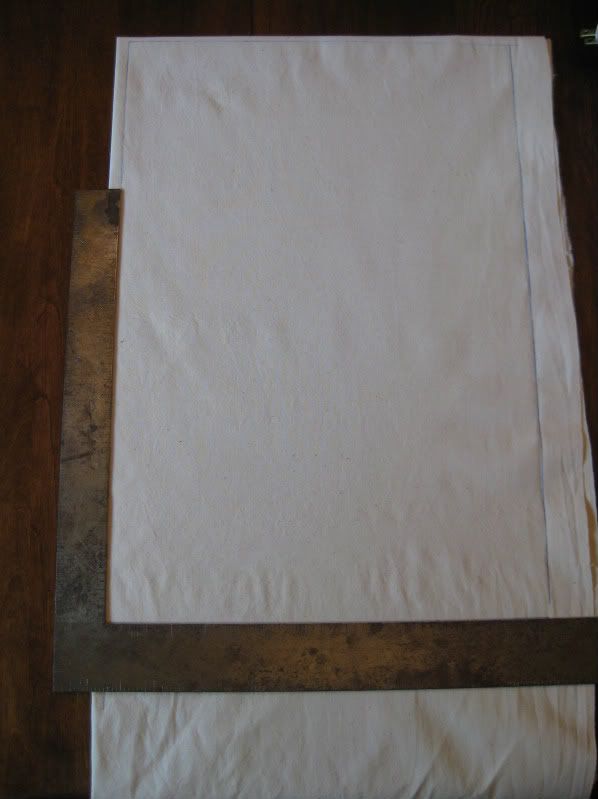
Decide how big you want your placemats to be and cut out your fabric (two pieces for each placemat), adding an inch for seams. I used this rusty right angled ruler to draw out my rectangle. It's supposed to used for carpentry but it's my new favourite tool to use when I need to draw perfect 90 degree angles when sewing.

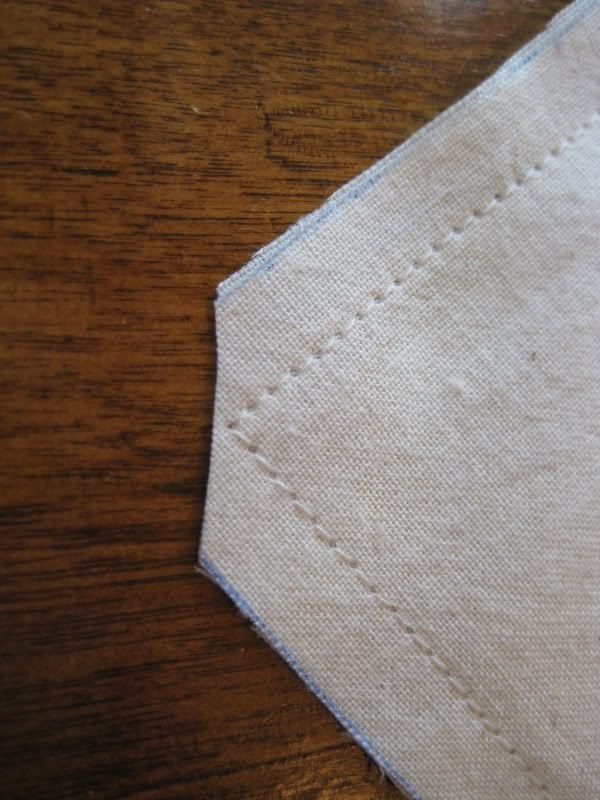
Sew a half inch from edge all around placemat leaving an opening about 3 inches wide.

Clip the corners.

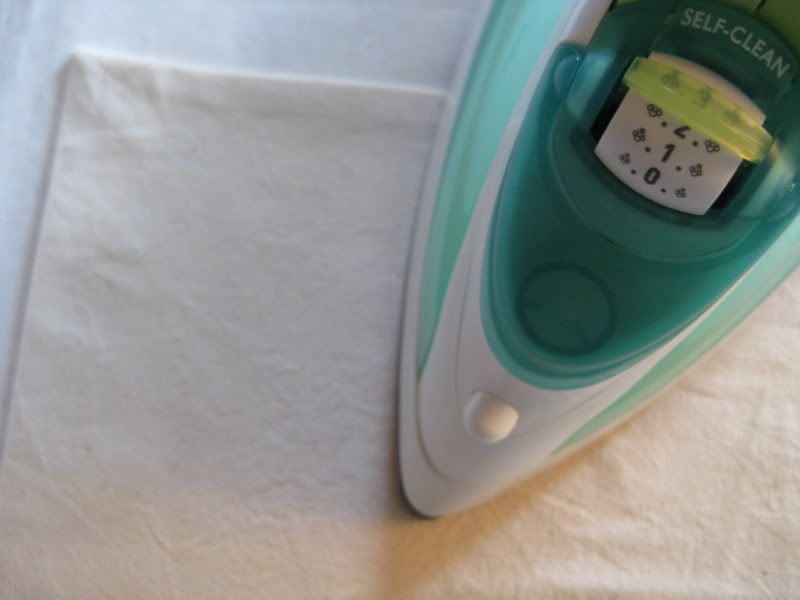
Turn placemat right side out and poke your corners out really well. I use the end of a small paintbrush to do this. Give placemat a really good press.

Now comes the super funnest part.
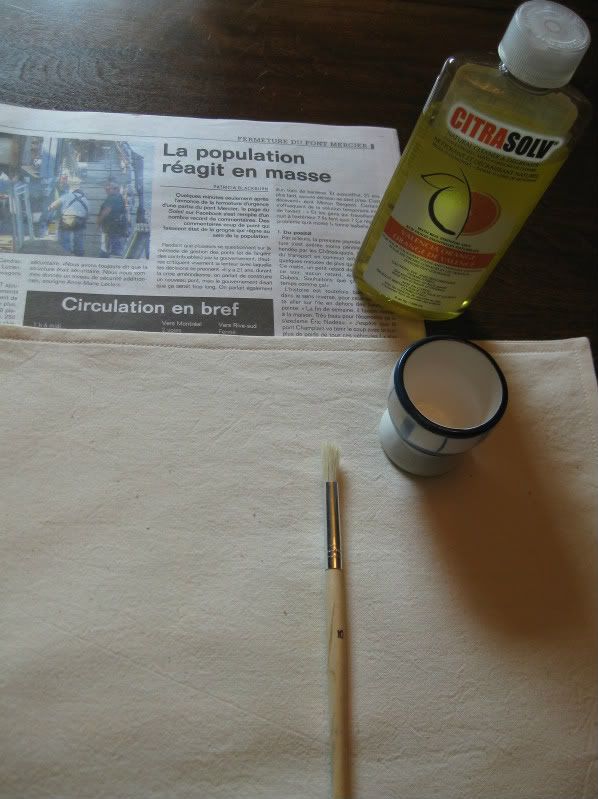
Find an image you want to use for your project. You will need to reverse the image produce a mirror image) especially if it contains print or your image will be transferred backwards. I used photoshop to flip the image. Print the image using a photocopier that uses toner, not ink. If you don't use a copy developed with toner, this is not going to work.
You will need to buy CITRASOLV the bottle on the very left shown on that link. It comes in orange and lavender, it doesn't matter which you buy, just as long as it's the concentrate.
Lay down a bunch of layers of newspaper and put your placemat on top of that. The newspaper will absorb any moisture and act as a cushion while you're working with your image. Pour out a very small amount of Citrasolv into a dish. Whatever is unused can be poured back into the bottle.
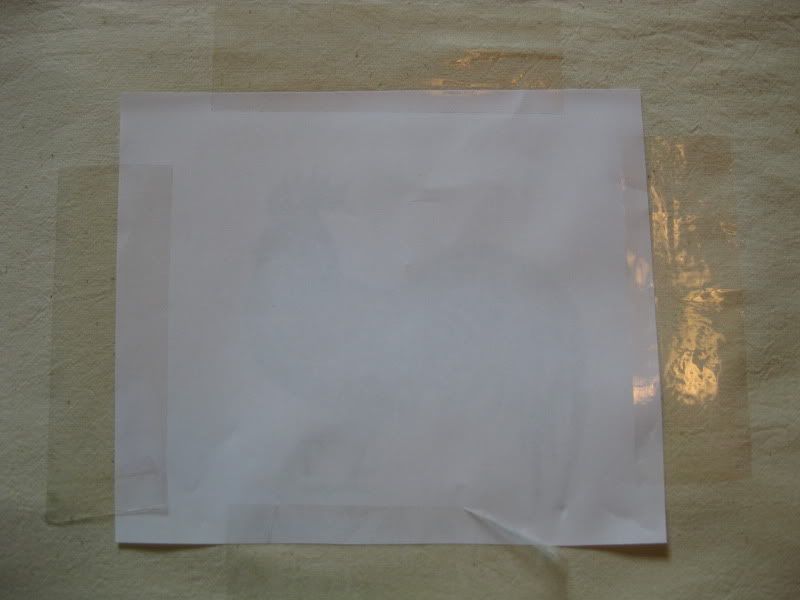
Using a tape measure or ruler, center your image on the placemat. Make sure that it's vertically and horizontally centered. You should be able to see the image through the wrong side of the paper well enough to do this. Once you are sure it's level and centered, tape the photocopy down with the image side facing the fabric, making sure that the tape isn't touching any of the image, or whatever part of the image is covered with tape won't transfer.


I didn't photograph this next step because it needs to be done quickly and I was home alone except for my cats who don't have thumbs.
Dip a small paintbrush into the Citrasolv and brush the liquid all over the image. Go really easy on the quantity of the Citrasolv or you will get a completely blurred image - you don't need much. You may want to do a test on scrap fabric (highly recommended) to see how little or how much you should be using.
As soon as you touch the brush to your photocopy, your image will immediately appear. It's going to look blurry, but don't panic, that's normal. Once you have gone over the entire image with the paintbrush, take a spoon and using the back of it, rub it all over the image for about three minutes without stopping.

It's not a good idea to peel back the photocopy and check to see what's going on during the process until that three minutes are up because you are most likely not going to set it down exactly right and your image will blur.
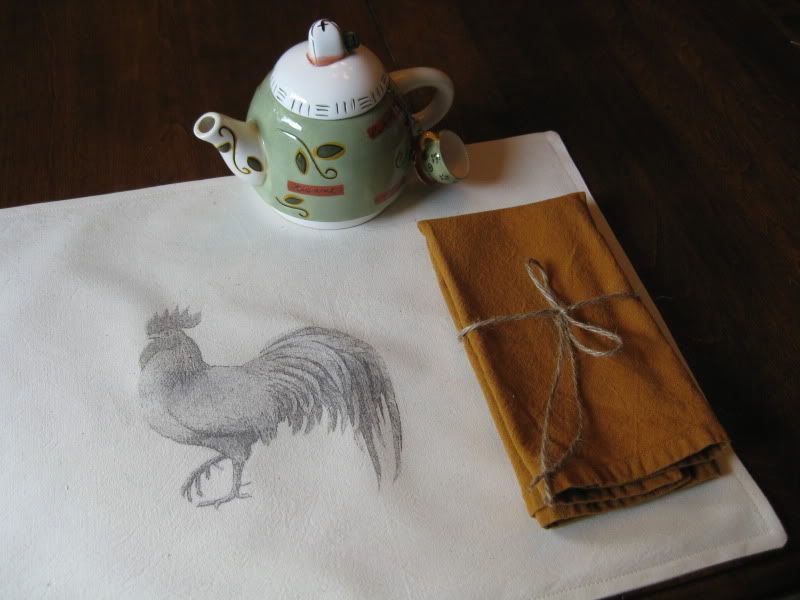
Peel off the photocopy and see the magic!
Using a dry iron, press over your image to release the Citrasolv - it smells heavenly.
You are done. Go have tea!
I have received a lot of questions about the durability of the image during washing. I have washed everything I have made that has transfers on them, but I have washed by hand. I only wash by hand because the items get badly stained (placemats, kitchen chair cushions) and need to be pre-treated and soaked for a long time which I do in a sink.
If you think about it, these items if washed in a washing machine would get a milder treatment and shorter time in the laundering process, so I do believe they would be machine washable, but I wouldn't use bleach.
This transfer method also works on wood, you can see an example I did here on a wood toolbox.
When transferring an image on wood, the process is the same, only you will have to use more force when rubbing the image with your spoon.
Edit:
I have been asked quite a lot about where to find CitraSolv, and if you visit the CitraSolv website, there is a list of retailers who sell it online, so hopefully one of these sites will ship to your country.
I have been asked if there is a another product that is similar to CitraSolv that can transfer images, and what I have found out is that you need to find a product that contains Xylene. This can be found in hardware stores. It's a solvent, and you will need to work in a well ventilated area with it. Your fabric will need to be washed to remove any unwanted odor. From what I have read, your images will be as good or better than those produced with CitraSolv.
I have been asked if the images will stand up to repeated washes, and so far, mine have.
omg omg omg this is fantabulous...
ReplyDeleteI'm inviting you to add this awesome tutorial to our linking party at
http://www.passionatelyartistic.com/2011/07/american-pickers-with-linking-party.html
Have a great weekend,
Maggie
Can this be laundered? Or will it fade away if it gets wet?
ReplyDeleteThank, this'll be helpful! <3
ReplyDeleteThank, this'll be helpful! <3
ReplyDeleteI`ve seen some of your works on craftgrrrl and love them, but honestly thought the process to be much more complicated.
ReplyDeleteNow that you shared the tutorial I want to try my hand at it! (that is if I can find a product to replace citrasolv as I'm in a different country and that particular brand doesn't sell here, but the xylene commet will surely help me with that).
Thanks!!!