

Wednesday, 30 April 2014
Toddler Arrowhead Lace Headband With Crocheted Flowers
Saturday, 26 April 2014
Jack, Jackie, The Jackster, Jackinator, El Jackal, Ja-KAY

This is Jack, who we rescued from a local shelter. The other cats are still adjusting to this guy invading their space, but it's slowly getting better.
As you can see, he's adjusted swimmingly to having a roof over his head and three squares a day.


Thursday, 17 April 2014
Newborn Hooded Cardigan

This sweater was meant to be given as a gift, but the newborn baby is a chunky monkey and will need a bigger size.

Friday, 11 April 2014
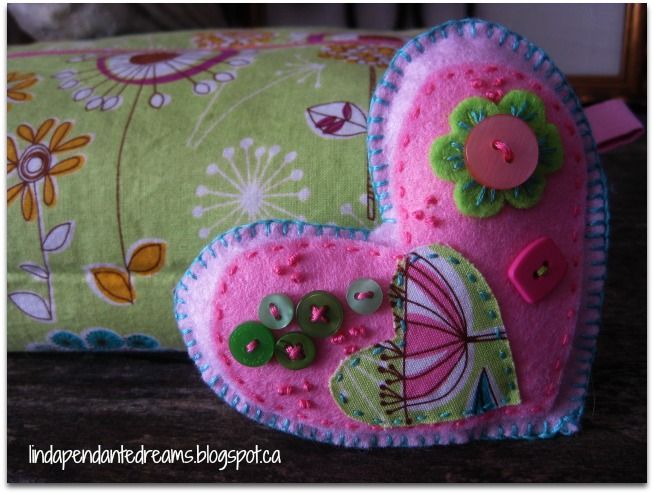
Boxed Bag and Needle Holder
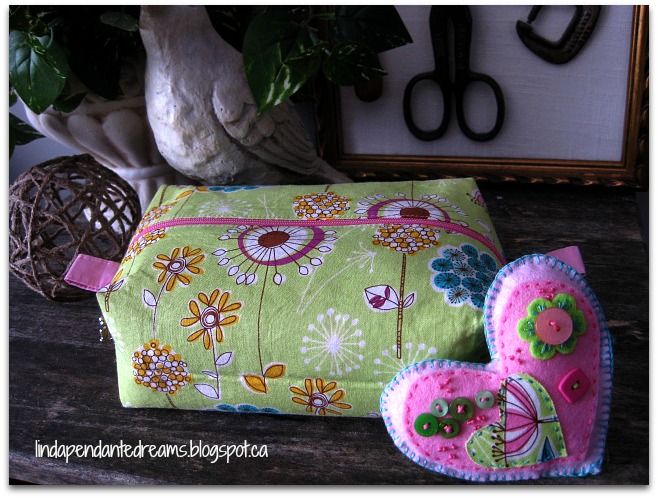 |
| I made this boxed bag and sewing needle holder for my knitting odds and ends. |
I used a tutorial which I found online by doing a general search; there are several great ones to chose from.
Monday, 31 March 2014
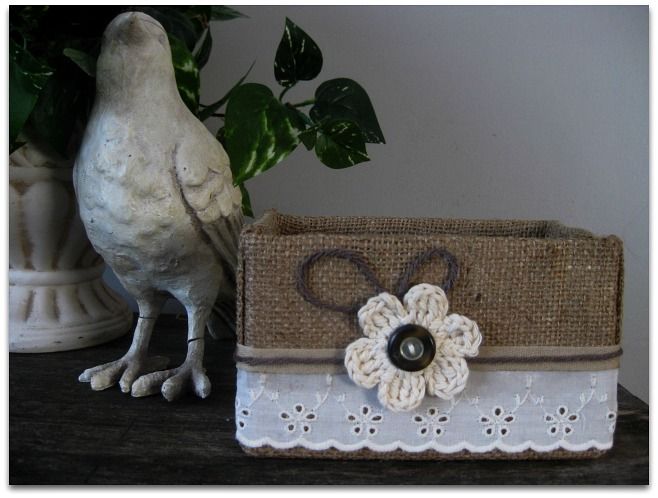
Burlap Covered Box
I crafted this little box for storage today.


It's a simple little project, and here's a brief explanation of how it's done:
Choose your fabric and wrap your box as you would a present. I used a plain ole cardboard box, cutting off the top to create an open box. I used Mod Podge to glue the fabric in place.
I used pegs to keep the fabric in place while it dried, like so.
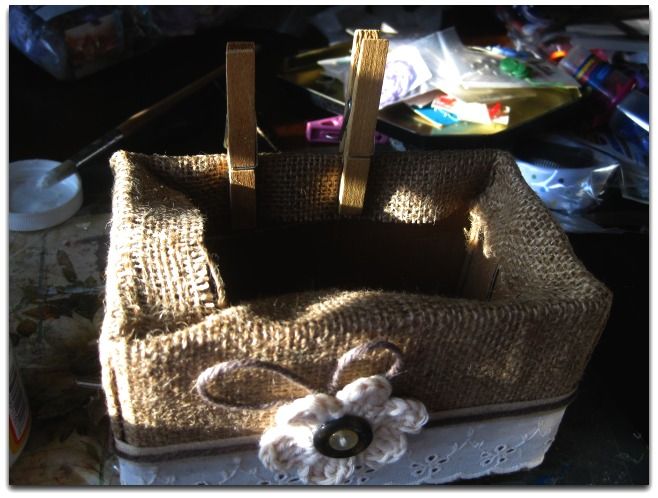
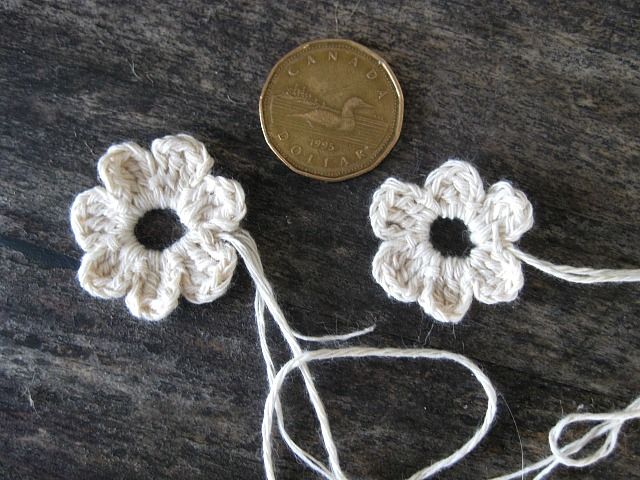
Embellish with...whatever. I used Mod Podge again to glue the elements in place. The daisy was crocheted with butcher's twine. I found a tutorial with photos here which shows how to crochet daisies and I sort of got addicted to making them in different sizes. See how tiny?!
Look at the horrific mess I make no matter what I am crafting. Who would think this kind of destruction can happen while making a simple little box? Me, that's who. I'm impossible.

And there you have it.
Friday, 28 March 2014
Baby Giftwrapping
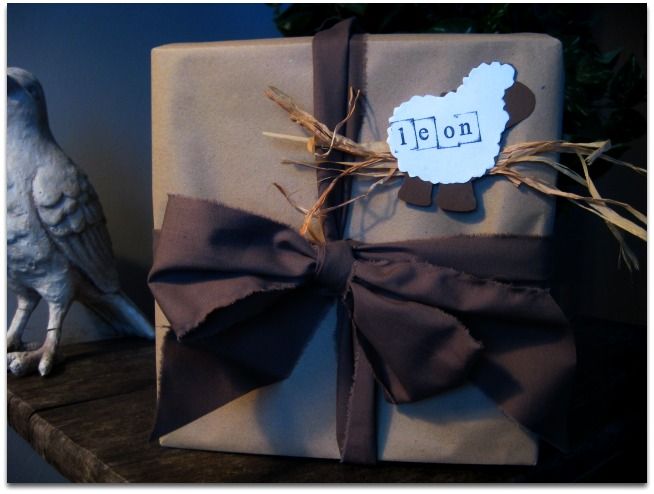
Here's another example of my rustic wrapping with a lamb cut out of card stock, and a bow made from ripped fabric strips.
Wednesday, 26 March 2014
Tulip Wreath

There is still snow on the ground, but I put together this wreath to encourage spring to come.
Wednesday, 19 March 2014
A Crop Of Newborn Baby Beanies


 |
| I had planned on knitting preemie hats to give to local hospital NICUs and after all the knitting, I realized they are all borderline too big for premature babies, so these are all for sale in my Etsy store. Back to the drawing board and knitting way smaller hats! |
Thursday, 27 February 2014

Tuesday, 25 February 2014
Briggs Mittens
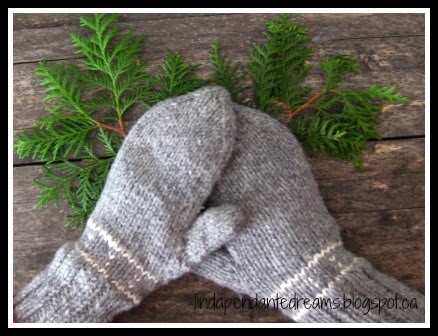
They were knit with pure wool from Briggs and Little, which is the first wool mill established in Canada in 1916, and is one of the few woolen mills still operating in North America.
The mill is located in New Brunswick on the east coast and boy, would I ever love to do a tour of that place!
Violet Radiate Cardigan

I knit this swing cardigan for the upcoming warmer weather.
Free pattern and details can be found on my Ravelry account.
Altered Floral Notebook

I put together this little notebook yesterday when I needed a bit of distraction.
The hardback notebook is from the dollar store and was covered with cotton fabric which I left very wrinkled on purpose.
The flower petals were cut out of a thicker fabric which frays. I embroidered around each petal and stitched french knots on the center part. I used regular markers to colour the stem and petals and then glued everything down with mod podge.
I printed out the little love quote on white tissue paper and then mod podged it onto the fabric.
Thursday, 19 December 2013
Wood Notecard Box Makeover

My dear friend sent me a wood box that previously held notecards because she knows I'm mad about boxes.
I did a streaked paint job in black on the bottom and then applied flat latex in cream to the lid. I lightly sanded over the cream paint to give it a roughed up look and then did an image transfer using Citrasolv on top.
Because the box has a textured finish, the image is all vintagey looking which is what I was aiming for.

Monday, 16 December 2013
Rustic Christmas Star Giftwrapping

I am lucky enough to have a ton of off cut fabrics from a bedding factory, so my ribbons and bows are ripped into strips using the offcuts, but you can certainly use old white sheets that are destined for the rag bin.
The simple salt dough recipe is:
1 cup of salt (get it at the dollar store, it's cheaper than the grocery store)
2 cups of flour
3/4 cup of water
You may have to adjust the water/flour by a bit, and I always add a bit of oil, about a tablespoon. This keeps the dough from sticking to your hands. Once you've rolled the dough and cut out your shapes, bake at 200 degrees for about an hour. You can also leave them to dry for a day or so.
I brushed my stars with Mod Podge and then sprinkled gold glitter all over.
I used a stamp set to mark the name of the recipient, and I'm going to see if I can stamp right onto bare dough ornaments because I think that would be a cute presentation too.
Monday, 2 December 2013
Felt Christmas Soldiers

I crafted these adorable Christmas soldiers today using felt, some gold braid I found at the fabric store, and some gold beads.
After assembling and gluing the front of the soldiers, I traced out the finished soldier on a solid piece of black felt and then glued front to back to add some stiffness to them.
Snowman Winter Wreath

I made this simple wreath today with a wreath that was destined for a yard sale this fall, and a bunch of dollar store snowmen that I had collected over the years and wasn't using anymore.
I added a few recycled jingle bells and some pine cones I had found on the ground during a summer picnic.
Wednesday, 16 October 2013
Dragonfly Tablet Sleeve

I know, I know! My dragonfly love is getting out of control! But I gave into my addiction to sew up a simple tablet sleeve. I did some stitching on the wings to resemble veins but it's not showing up here.

The wee pocked holds the wee SD card adapter or whatever the kids are calling it these days. The shade of green is not true to the colour in this photo.

Why did this turn sideways? Baffled.

I used synthetic felts for this project and I was iffy about it because I have only ever used pure wool felt, but I actually like this stuff as it won't pill or fray, so I have found it to be a decent product and it costs fifty cents for an 8X8 piece.
If you can believe, it was cheaper to have this shipped from freaking TAIWAN than from any vendor in Canada or the USA, on Etsy.
Sunday, 13 October 2013
Fall Luminary

I made this simple luminary with a glass mayonnaise jar and coated some maple leaves with Mod Podge and arranged them on the glass.
Friday, 11 October 2013
Fall on the Wall


I set out two more on the side table and I'm waiting to see how long they'll last because Canadian Thanksgiving is this Sunday, and I'd like to have them as part of my dining room decor.
I love fall so much, but the changing of the leaves needs to last longer than it does, because it's just so spectacular and stunning. I love the smell of dying crisp leaves and the rustling sound they make when you walk through them.
I will say that they break my back to rake them up, though. That is some serious pain!
Subscribe to:
Posts (Atom)