Showing posts with label gift wrapping. Show all posts
Friday, 20 January 2017
Rustic Baby Shower Gift Wrap
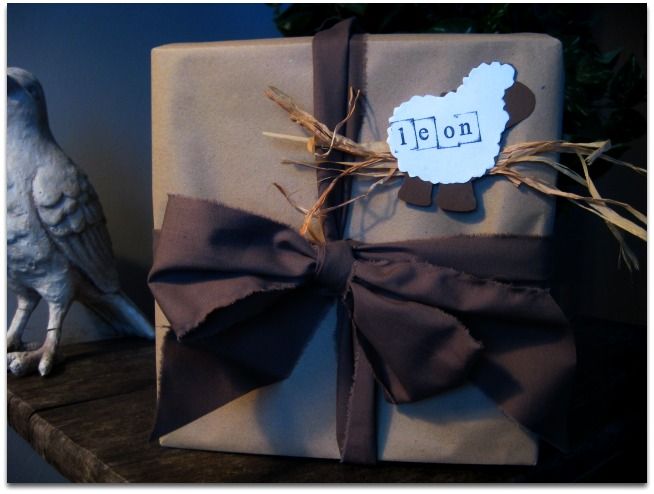
I created this gift wrapping for my niece's baby shower gift using rugged packing paper from a dollar store which I sewed together and decorated.
This paper is pliable and wrinkles up and can be sewn without tearing. I made the lamb from a template I found online and printed out on card stock. The body of the lamb is covered in a fuzzy felt.
The enclosure has raffia threaded through holes made with a paper punch and tied into a bow at the end.
Cost of project: zero dollars and zero cents because the materials are from my crafting stash.
Labels:
baby,
gift wrapping
Friday, 12 February 2016
Baby Carriage Gift Wrap

This Baby Carriage gift wrapping was crafted with paper and stitched on a sewing machine. This size carriage will accommodate a newborn baby sweater, booties, socks or a headband.
I simply found an image of this carriage and as you can see, you need to know how to draw two circles to make this. I know what you're thinking - hard. So make a template by drawing a circle that's 12 inches in diameter. Draw two circles that are 6 inches in diameter and you got wheels. Now cut your 12 inch circle into pacman. Still hard?
Leaving pacman's mouth open, stitch around the carriage and stitch spokes on the wheels. Stuff your baby gift in there and stitch the remaining edges.
Decorate however you like, and you've got game. You just won at cutest baby wrapping ever and that mom is going to get gooshy when you give this to her.
Labels:
babies,
baby carriage,
flowers,
gift wrapping,
paper craft
Saturday, 16 August 2014
Friday, 28 March 2014
Baby Giftwrapping
Here's another example of my rustic wrapping with a lamb cut out of card stock, and a bow made from ripped fabric strips.
Labels:
gift wrapping
Monday, 16 December 2013
Rustic Christmas Star Giftwrapping
My simple gift wrapping this Christmas was done with my typical kraft paper wrapped with white bows and adorned with gold glitter salt dough stars.
I am lucky enough to have a ton of off cut fabrics from a bedding factory, so my ribbons and bows are ripped into strips using the offcuts, but you can certainly use old white sheets that are destined for the rag bin.
The simple salt dough recipe is:
1 cup of salt (get it at the dollar store, it's cheaper than the grocery store)
2 cups of flour
3/4 cup of water
You may have to adjust the water/flour by a bit, and I always add a bit of oil, about a tablespoon. This keeps the dough from sticking to your hands. Once you've rolled the dough and cut out your shapes, bake at 200 degrees for about an hour. You can also leave them to dry for a day or so.
I brushed my stars with Mod Podge and then sprinkled gold glitter all over.
I used a stamp set to mark the name of the recipient, and I'm going to see if I can stamp right onto bare dough ornaments because I think that would be a cute presentation too.
Labels:
Christmas,
gift wrapping,
mod podge
Wednesday, 17 April 2013
Subscribe to:
Posts (Atom)