I sewed this simple tote today, transferring a vintage ad for McCallum stockings from the 1930s.
I have a tutorial for the tote here You would sew the tote minus the ruffles shown on the tutorial.
If you would like to know how to transfer images onto fabrics, I have a tutorial for that here.
I had cut this brown eyelet off of a skirt and almost threw it away recently when I was tidying up my stash. I was thinking, when will I ever use this stuff? The answer is, six years after cutting it off of a skirt. Never throw your stuff away!
Thursday, 28 February 2013
Tote With Vintage Stocking Ad
Labels:
Image transfer,
sewing,
tote
Wednesday, 27 February 2013
Tuesday, 26 February 2013
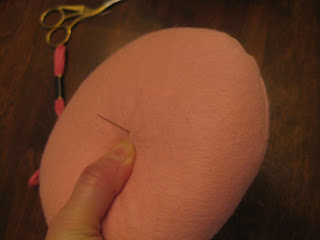
Felt Pin Cushion
I have been sewing since I was a child and yet I've never had a pin cushion. I remedied that situation today.
I used the same colours as had in the needle case I made a while ago so that I have a matched set.
Here's a quick and easy tutorial:
Cut two circles 6 1/2 inches in diameter.
Sew 1/4 inch seam all the way around.
Cut a one inch X carefully in the center on one side of the fabric and turn right side out.
Stuff firmly.
Stitch up the X.
Pull the embroidery floss tightly around to the back side and push the needle through the center of the circle again (back to front). Position the embroidery floss over the same strand you just stitched, wrap the floss tautly around to the back, and push your needle through the center of the circle from back to front again.
Continue to tautly wrap the floss in the same manner as above so that you section the circle into quarters. Remember to wrap each stitch twice.
Tightly wrap the floss in between each quarter. You should end up with 8 sections.
I drew out a flower design on paper and traced it out onto felt, stacking the petal parts. I did the same with circles, and then sewed a button through all the layers. I embroidered wee stitches around the circles and petal edges, using two strands of floss.
I attached the flower to the pin cushion (on the side which has the X) using hot glue.
Friday, 1 February 2013
Knit Shawlette
I knit this shawlette to replace one that a staff member of a department store walked away with.
I much preferred the pattern of the shawl that was taken from me, but the yarn used to knit this one is so much softer as it contains cashmere.
I'll knit the pattern of the original shawl when the store compensates me for the loss and I can find a nice yarn in brick red.
This photo shows the whole shawl, but the colour isn't showing up correctly. The actual colour is shown in the first photo.
More information and a link to the free pattern can be found on my Ravelry page
Labels:
knitting
Subscribe to:
Comments (Atom)


